How to replace an oil seal on a truck?
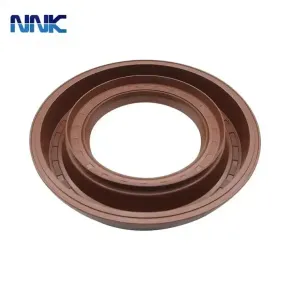
Maintaining your truck's optimal performance involves periodic checks and replacements of essential components, and one such critical part is the oil seal. Here's a comprehensive guide on how to replace an oil seal on your truck, ensuring longevity and efficient operation.
1. Gather Necessary Tools and Materials:
Before embarking on the replacement process, make sure you have the following:
New oil seal
Screwdrivers
Pliers
Hammer
Seal puller or pry bar
Clean rags
Oil or lubricant
2. Safety First:
Ensure the truck is on a level surface, engage the parking brake, and wear appropriate safety gear, including gloves and safety glasses.
3. Locate the Oil Seal:
Identify the position of the oil seal. Common locations include the front and rear of the engine, transmission, or differential.
Related links:What Does the Clutch on a Car Actually Do?
Everything You Need to Know about a Brake Slave Cylinder
A Comprehensive Guide to Choosing the Right Types Of Brake Pads
How EPDM rubber sealing strips provide superior protection against the elements
How much does it cost to replace a radiator?
What is the main part of a truck engine?
What is the difference between 3M 1080 and 2080?
4. Drain Oil (if necessary):
If the oil seal is located in a component that holds oil, drain the oil to prevent spills during the replacement.
5. Remove Obstacles:
Clear the area around the oil seal. This may involve removing components like belts, pulleys, or other items obstructing access.
6. Extract the Old Oil Seal:
Use a seal puller or pry bar to carefully remove the old oil seal. Take precautions not to damage the surrounding components.
7. Clean the Area:
Thoroughly clean the area where the new oil seal will be installed. Remove any debris, dirt, or remnants of the old seal.
8. Apply Lubrication:
Before installing the new oil seal, apply a thin layer of oil or lubricant to the inner lip. This ensures proper lubrication during initial operation.
9. Install the New Oil Seal:
Position the new oil seal in place. Use a seal driver or a block of wood and a hammer to gently tap the seal into position. Ensure it sits flush with the surrounding surface.
10. Check for Proper Alignment:
Verify that the oil seal is evenly seated and aligned. It should not be tilted or protruding unevenly.
11. Reassemble Components:
Reinstall any components that were removed to access the oil seal. This may include belts, pulleys, or other parts.
12. Refill with Oil:
If oil was drained, refill the component with the appropriate amount and type of oil.
268
0
0
268
0
0
Related Articles
-
202
0
0
-
204
0
0
-
The Ultimate Guide to OEM Springs: Everything You Need to Know
### The Ultimate Guide to OEM Springs: Everything You Need to Know.
225
0
0
-
227
0
0
-
338
0
0
-
352
0
0
-
384
0
0
-
392
0
0



Comments
All Comments (0)